You can configure IPK settings for each partition defined in your system.
Configuring Settings for a Specific Partition
Before you start
You do not need to enable partitions in order to configure these settings. If partitioning is not enabled, settings configured here will apply to the entire system. If partitioning is enabled you can configure these settings differently for each partition. For more information on how partitioning works, see Partitioning.
Ensure you are in the correct partition before applying the settings as these settings will apply to that partition.
You must have IPK Set Up enabled within your General Access Security Role to configure the IPK management settings.
-
Select the Menu button
 , then Admin, and then select System Administration. The System Administration window is displayed, with a menu of options available
  . In the Explorer pane, locate the IPK Management group
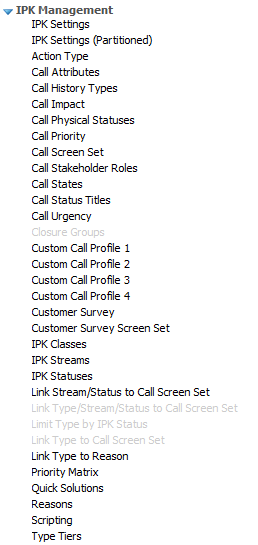
  , scrolling up or down if necessary. You may need to expand the group to see the options.
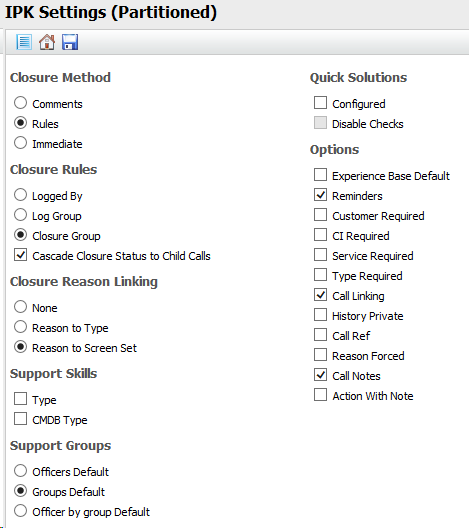
 - Select IPK Settings (Partitioned) to open the window
 .
. - Select the options that you require for your partition.
- the logging analyst is flagged as Unavailable, deleted, not an Analyst, not flagged as a call recipient, or is not an IPK Analyst.
- the Log Group or Closure Group is deleted.
- Select
 to save the changes. Provide the Change Reasons if prompted to do so.

|
Use the options under the Closure Method heading to indicate the procedures to be followed when calls are closed. Analysts are given authority to close calls as part of IPK Management security role, or by being added to a defined closure group. |
|||||||
| Comments | Select to force the Analyst who resolves a call (fixing the issue) to forward the call to an available closing analyst (who has Closure Comments selected in their IPK Management security role). The closing analyst adds comments on closure in the Comments field which are displayed in the call history. Call statuses relating to this option on the Calls Outstanding window are Forward for Closure and Forward to You for Close. |
||||||
| Rules | Select to enable the Closure Rules options below. | ||||||
| Immediate | Select to close calls immediately when the Analyst selects the Close button on a call. The call will be automatically assigned a resolved state. This is the simplest option available and uses the minimum number of windows to close a call. | ||||||
| Closure Rules |
You can select different rules for call closure. These rules automatically forward the call to an analyst or group when the call is resolved at the Close Call window. There are three Closure Rules options: Logged by, Log Group, and Closure Group. However, in the following circumstances, the call will instead be closed immediately: |
||||||
| Logged By | Select to enable the Analyst who logged the call to close the call. If the call is forwarded to another Analyst who resolves it, the system automatically forwards the call to the original Analyst to review and close. If the call is opened and resolved by the same Analyst, the call is closed immediately. Call statuses related to this rule on the Calls Outstanding window are Forward for Closure and Forward to You for Close. This option is only available if Rules has been selected under Closure Method. |
||||||
| Log Group | Select to enable a member of the group that logged the call to close the call. If the call is forwarded to an Analyst in another group who resolves it, the system automatically forwards the call to the original group (that is, to all members of that group) to review and close. This option is only available if Rules has been selected under Closure Method. |
||||||
| Closure Group |
Select to nominate a group responsible for closing all calls. This forces all resolved calls to be forwarded to the specified closure group for review and closing by an analyst in that group. Any IPK group can be designated as a closure group. The name of the closing Analyst is added to the call history. If Closure Group is selected, an Analyst belonging to the closure group will see only options to Close, Close New, Reopen, and Cancel in resolved calls. If the call is not ready to be closed, the Analyst could reopen the call and then forward it to a group or analyst. |
||||||
| Cascade Closure Status to Child Calls | Select to ensure the status of any linked child calls is consistent with the status of the parent call when Analysts close parent calls manually, or a parent call is resolved when an IPK Workflow Rule triggers an Assignment Workflow on Call Resolve. If any linked child calls are already closed, they will remain closed. Deselect to allow the closure status of linked child calls to be determined only by the Closure Method and/or Closure Rules. If your Closure Method is Immediate/Comments/Rules, and a call is closed, the call changes from Open to Closed. Linked child calls that are Open/Open-Resolved will change to Closed. Those that are Closed will stay Closed. If your Closure Method is Comments/Rules, and the call is forwarded to an analyst/group for comments/closure, the call changes from Open to Open-Resolved. Any linked child calls that are Open will change to Open-Resolved; those that are Open-Resolved stay Open-Resolved; those that are Closed stay Closed. If your Closure Method is Comments/Rules, and the call is closed by the Analyst/group required to do so, the call changes from Open/Open-Resolved to Closed. Any linked child calls that are Open/Open-Resolved will change to Closed; those that are already Closed will stay Closed. If an IPK Workflow Rule triggers an Assignment Workflow on Call Resolve and forwards the call as Open-Resolved to an Analyst/group to close, any linked child calls that are Open are changed to Open-Resolved; those that are already closed stay closed. A Closure Rule is in place to forward calls to the Problem Management Group to close and the Cascade Closure Status to Child Calls option is selected. An Analyst in the User Service Group closes a call. The call is then assigned to the Problem Management Group as Open-Resolved. This call also has three child calls, which are Closed, Open, and Open-Resolved. When the User Service Analyst selects Yes in the popup to also resolve the linked child calls, the Closed child call stays Closed, the Open child call changes to Open-Resolved, and the Open-Resolved child call stays Open-Resolved. This ensures that the child calls reflect the closure status of the parent call. An analyst in the Problem Management Group now closes the parent call and selects Yes in the popup to resolve all the linked child calls. The parent call changes to Closed, and the Open-Resolved child calls are also Closed. |
||||||
| Closure Reason Linking |
Select from the radio buttons to specify whether/how the call closure reasons are to be linked. If your system is partitioned on types or screen sets, the visible list will be based on the active partition.
|
||||||
|
The Support Skills options determine how Analysts are profiled; by type, by CMDB type or both. Selecting one or both the options enables Analysts to be linked to issue types and/or CMDB item types as a means of identifying their skills and experience. When an Analyst is forwarding a call , they can select the Support Skills explorer option on the Call Details window to see which Analysts have experience dealing with the CMDB item type or issue type they have selected. |
|||||||
| Type | Select to enable Analysts to be profiled by issue type | ||||||
| CMDB Type | Select to enable Analysts to be profiled by CMDB item type | ||||||
|
The Support Groups options allow you to indicate the default view for choosing recipients when forwarding a call through the service desk. When an Analyst goes to the Forward Internally window, the Analyst/group radio buttons will be selected based on the option selected here. Analysts can select a different option on the Forward Internally window if they wish. |
|||||||
| Analysts Default | Select to display all Analysts to whom the call can be forwarded | ||||||
| Groups Default | Select to display all IPK groups to whom the call can be forwarded | ||||||
| Analyst by Group Default | Select to display all the IPK groups to whom the call can be forwarded, and the analysts in each group. | ||||||
|
The Quick Solutions options allow you to enable Analysts to use quick solutions. Quick solutions are macros that automatically input details into the Call Details window and are especially useful for recurring issues. |
|||||||
| Configured | Select to enable quick solutions to be defined in the system. This activates the Quick Solutions option, where quick solutions are defined. |
||||||
| Disable Checks | Select to enable a call to which a quick solution has been applied to be closed immediately, bypassing the validation checks, such as User Required, CI Required, Service Required and Type Required. This means that even if mandatory fields are left incomplete, the call can still be closed. | ||||||
| The remaining Options the IPK Settings (Partitioned) window are described below. | |||||||
| Experience Base Default | Select to add calls to the Experience Base on closure unless the Analyst specifically clears the selection before closing the call. | ||||||
| User Required | Select to make the User field mandatory when logging a call | ||||||
| CI Required | Select to make the Configuration Item field mandatory when logging a call. | ||||||
| Service Required | Select to make the Service field mandatory when logging a call. | ||||||
| Type Required | Select to make the Type field mandatory when logging a call. | ||||||
| Call Linking | Select to enable the Linking explorer option on the Call Details window, used for linking related calls to one another. | ||||||
| History Private | Select to clear the Visible in Self Service Portal checkbox on the Call Details window by default, making call histories unavailable on the vFire Self Service portal. Analysts can still select the checkbox on the Call Details window if they wish to make a particular call’s history details visible on the Self Service portal. | ||||||
| Call Ref | Select to automatically allocate a reference number to a call, in addition to the automatically assigned, unique call number. Analysts can overwrite the Ref field if they wish, unless it is made read only in the Designer by editing the Call Details screen. Deselect to leave the field blank. The Analyst can still manually enter a value if they wish. This is useful, for example, if a reference number is allocated by an external supplier, or provided by the caller if the help desk is supporting external clients. The same reference may also be used for calls that relate to a specific issue. |
||||||
| Reason Forced | Select to make it mandatory for Analysts to select a Reason when closing a call. Usually, this is the reason for closing the call. If a reason is not selected, a warning message is displayed. | ||||||
| Reason to Type |
Select to enable reasons to be linked to issue types. In this case, when an Analyst selects an Issue Type, only those reasons associated with that issue are available from the Reasons list. |
||||||
| Call Notes | Select to enable Analysts to add notes to calls, including calls owned by other Analysts. When selected, the Add Note explorer option is displayed on the Call Details window, and the Add Note button is enabled on the Analyst’s Outstanding windows. | ||||||
| Action with Note | Select to automatically update the Time Last Action value whenever a note is added to a call. You can view the Time Last Action for a call on the Information Panel. |
||||||