Screen Sets for Requests, Tasks and Approvals
By default, only one screen set is available for requests, one for tasks, and one for approvals. However, you can define more. Custom screens can be created in the Designer and associated with the custom screen set when creating the screen.
Creating a Screen Set
Before you start
You must have Workflow Management Set Up enabled within your General Access Security Role to work with screen sets.
- Select the Menu button
 , then Admin, and then select System Administration. The System Administration window is displayed, with a menu of options available
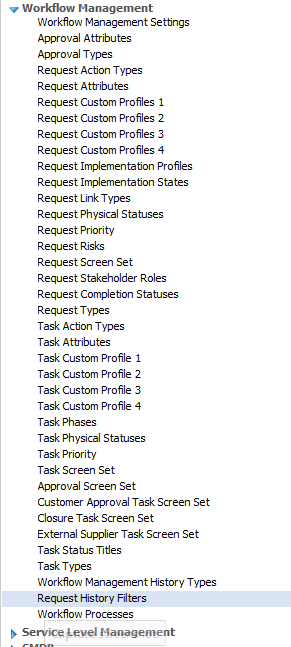
  . In the Explorer pane, expand the Workflow Management group of options, scrolling down if necessary
  .
. - Select the appropriate menu option.
- A browse table is displayed, listing the existing screen sets. Select
 to display the <Entity> Screen Set Details window
  . (The fields displayed will vary slightly depending on the type of screen set.)
 - Type the name you wish to specify for this screen set in the Name field. This field is mandatory, as indicated by the asterisk.
- Complete the details:
- Select
 to save the changes. Provide the Change Reasons if prompted to do so.

| Request Screen Set | screen sets for requests |
| Task Screen Set | screen sets for tasks |
| Approval Screen Set | screen sets for approval tasks |
| User Approval Screen Set | screen sets for User approval tasks |
| Closure Task Screen Set | screen sets for closure tasks |
| External Supplier Screen Set | screen sets for external supplier tasks |

| Assign Partition |
This field is only displayed if your system is partitioned and enabled for request screen set partitioning. Select the partition you want to assign to the screen set from the drop-down list. Task and Approval screen sets inherit the partition from the associated request screen set. |
||||
| Request Screen Set | Select the existing request screen set you want to associate with the new task, approval , User approval, or closure, etc screen set. If your system is enabled for request screen set partitioning, the partition is inherited from the associated request screen set. |
||||
| Linked Tasks default Screen Set |
This field is only displayed if you are adding a request screen set. Select the existing task/approval screen set you want to associate with the new request screen set. |
||||
| Screens | The browse table displays the screens, forms, and message templates in this screen set. By default, a new screen set inherits the screens, forms, and templates from the default (parent) screen set. If you have permission to configure screens using the Designer, you can select Open Designer at the top of the window to configure or create screens in this screen set. |
||||
| Ticket Report | Ticket reports can be accessed from the Search and Outstanding windows by selecting the Ticket Report toolbar button. Use the radio buttons to indicate the ticket report you wish to use for the screen set.
|
Request Screen Sets must be selected in the Multiple Screen Sets section of the Workflow Management Settings window to allow Analysts to switch between request screen sets when in a request or workflow template.
Multiple Task Screen Sets must be selected in the Multiple Screen Sets section of the Workflow Management Settings window to allow Analysts to switch between task or approval screen sets when in a task or approval.
Updating a Screen Set
Before you start
You must have Workflow Management Set Up enabled within your General Access Security Role to work with screen sets.
- Select the Menu button , then Admin, and then select System Administration. The System Administration window is displayed, with a menu of options available . In the Explorer pane, expand the Workflow Management group of options, scrolling down if necessary .
- Select the appropriate menu option:
- A browse table is displayed, listing the existing screen sets. Select the screen set you want to edit and then select
 .
. - In the Screen Set Details window, overwrite the name if you wish to change it, and the partition, if appropriate. Then update the rest of the details, as necessary.
- Select to save the changes. Provide the Change Reasons if prompted to do so.
| Request Screen Set | screen sets for requests |
| Task Screen Set | screen sets for tasks |
| Approval Screen Set | screen sets for approval tasks |
| User Approval Screen Set | screen sets for User approval tasks |
| Closure Task Screen Set | screen sets for closure tasks |
| External Supplier Screen Set | screen sets for external supplier tasks |
Deleting a Screen Set
If you delete a screen set, any custom screens associated with that screen set are also deleted and will appear annotated with [Deleted] in the inactive list of screens in the Designer. Any message templates are removed from the Message Type Map window. The deleted screen set is no longer available to be applied to a workflow, request, task or approval. However, any existing entities using the screens in the screen set will continue to use those screens.
Before you start
You must have Workflow Management Set Up enabled within your General Access Security Role to work with screen sets.
You cannot delete the system defined screen set.
- Select the Menu button , then Admin, and then select System Administration. The System Administration window is displayed, with a menu of options available . In the Explorer pane, expand the Workflow Management group of options, scrolling down if necessary .
- Select the appropriate menu option:
- A browse table is displayed, listing the existing screen sets. Select the screen set you want to delete.
- Select
 . If you attempt to delete the system default, you will receive a warning message. For other screen sets, you will receive a warning message telling you that there may be customized screens associated with the screen set. Select Yes to continue with the deletion.
 - Select to save the changes. Provide the Change Reasons if prompted to do so.
| Request Screen Set | screen sets for requests |
| Task Screen Set | screen sets for tasks |
| Approval Screen Set | screen sets for approval tasks |
| User Approval Screen Set | screen sets for User approval tasks |
| Closure Task Screen Set | screen sets for closure tasks |
| External Supplier Screen Set | screen sets for external supplier tasks |
Restoring a Deleted Screen Set
Before you start
You must have Workflow Management Set Up enabled within your General Access Security Role to work with screen sets.
- Select the Menu button , then Admin, and then select System Administration. The System Administration window is displayed, with a menu of options available . In the Explorer pane, expand the Workflow Management group of options, scrolling down if necessary .
- Select the appropriate menu option:
- From the browse table, select the Show Deleted radio button at the top of the window
 .
. - From the browse table of deleted entries, select the screen set entry you wish to restore.
- Select
 . The restored screen set appears when you select the Show Active radio button.
 - Select to save the changes. Provide the Change Reasons if prompted to do so.
| Request Screen Set | screen sets for requests |
| Task Screen Set | screen sets for tasks |
| Approval Screen Set | screen sets for approval tasks |
| User Approval Screen Set | screen sets for User approval tasks |
| Closure Task Screen Set | screen sets for closure tasks |
| External Supplier Screen Set | screen sets for external supplier tasks |
