Self Service Portal Tables
This feature is only available on SQL systems.
In vFire Self Service, information is displayed in tables, such as My Requests and My Incidents. 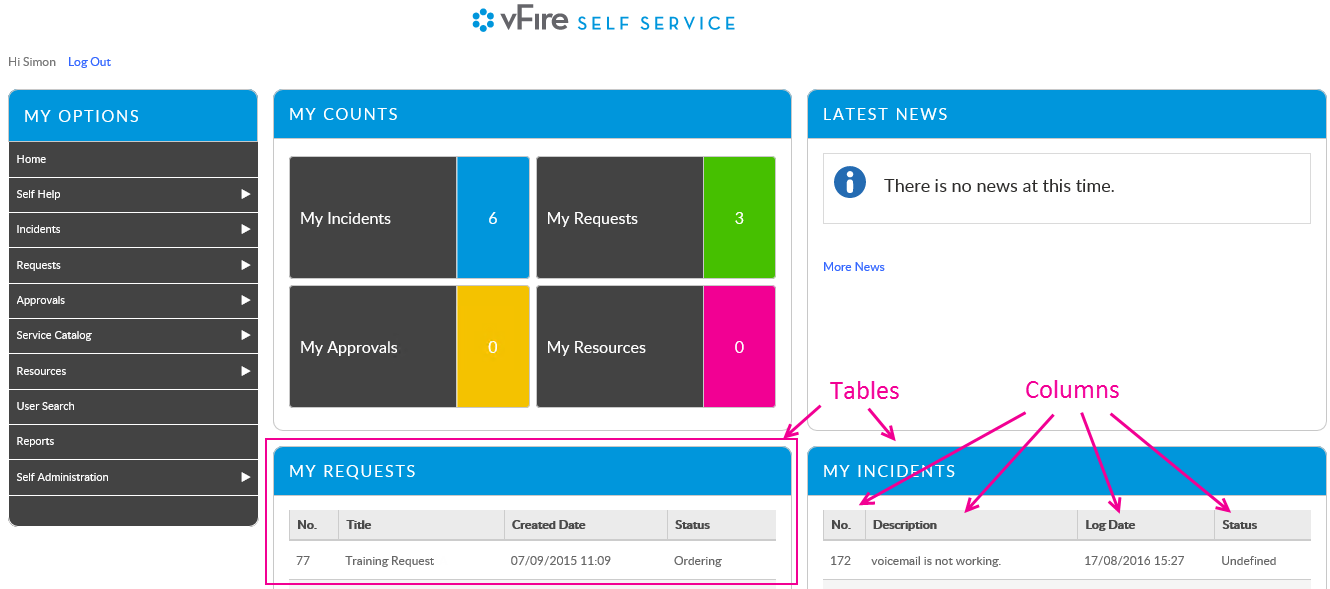 From 9.8.0, you can configure the tables to contain the columns that you want, in the order you want them, sorted by any available column.
Before you start
You must have System Setup selected in the Admin tab of your General Access Security Role.
-
Select Menu
 and then Admin. Select System Administration. The System Administration window is displayed.
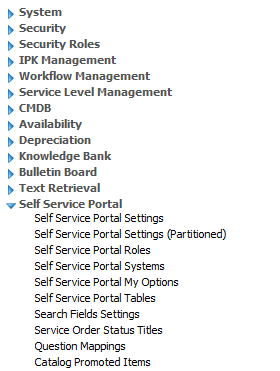
  In the Explorer pane, locate the Self Service Portal group, scrolling down if necessary.
  You may need to expand the group to see the options within it.
 - Select Self Service Portal Tables to display the window.

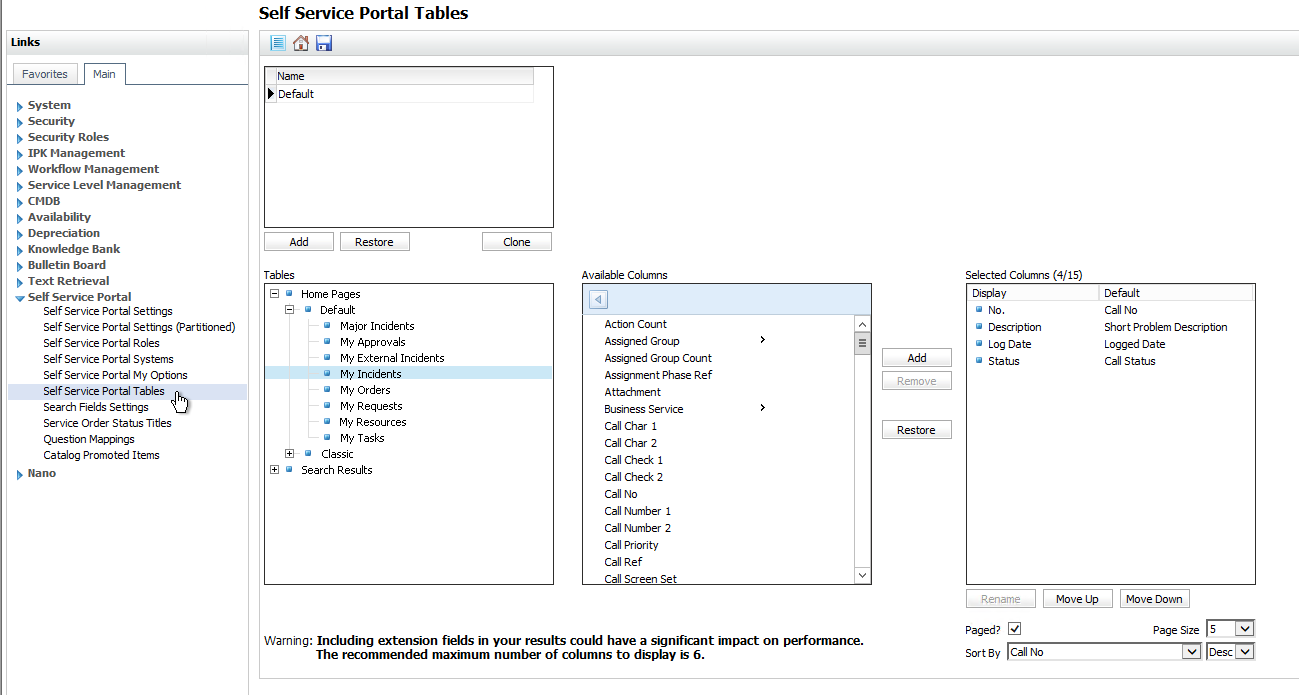
- At the top of the window you can see a box containing a list of all of the sets of tables that are held on your system. Initially, you will only see a single Default set. Beneath this there are three more boxes; Tables contains all of the tables on the Self Service portal; Available Columns contains all of the columns that can be held on the selected table; and Selected Columns lists all of the columns that currently appear in the table on the Self Service portal.
- To create a new set of tables, click
 beneath the box at the top of the window. This will create a default set of portal tables. If you want to copy a set of tables that you have already configured, select the set name, and then click
  .
.
To modify an existing set of tables, select the set in the top box to highlight it. - Select the table you want to modify in the Tables box. You will see a set of Home Pages, with the Default and Classic layouts; and a set of Search Results tables. Some of the items will represent groups of tables, as indicated by the
 sign. Expand the group by selecting the symbol.
 - When you select a table, all of the columns that could appear in that table are displayed in the Available Columns box. This list is made up of all of the fields for the entity, or any linked entities. Some of the entries in the box will display a small arrow to their right -
 . This indicates that these are categories, and there are lower tiers from which you can select. Double click on the category title to see the items within it. You will notice that the category name appears in the banner at the top of the box, with an arrow
  . Click on the arrow to return to the top level list.
For some of the tables, you will also see some buttons listed. These will generally also appear in the Selected Columns list, and will be mandatory, so cannot be removed. They do not have a Display name, as they are not columns as such, and they will be prefixed by a small orange dot, indicating that they are mandatory. - To select a column, you can either double click on it in the Available Columns box, or select it and click . Alternatively, you can click and drag it into the Selected Columns box.
- Ensure that you do not introduce a conflict into your results. For example, only open requests are displayed in the Self Service portal, so you should avoid selecting any of the Closure Analyst or Closure Group items, as this will instruct the system to find only closed requests, leading to blank search results.
- Including extension fields in search results can slow down performance.
- If you use the Catalog Portal, do not use column names that consist only of numbers. You can include numbers in the title, but it must also contain letters.
- Do not use special symbols in column names.
- Ensure that all of the columns can be accommodated in the table. If you are using the Default home page view, which shows two tables side by side, we advise a maximum of six columns for each table.
- To rename a selected column, click on it and select
 . In the Rename dialog box, key in the Display Column Name you want to appear in the table on the portal. You cannot change the Default Column name, as it is used in the database, and may be referenced elsewhere.
 - To change the order in which the columns are displayed in the table, click on the columns and use the
 and
and  buttons, or click and drag the items you want to move.
 - You can choose whether you want to paginate the results:
- You can sort the information on the table:
- When you have finished, select
 .
.

In the Major Incidents table, you will find the add me button listed in the Available Columns and Selected Columns boxes. 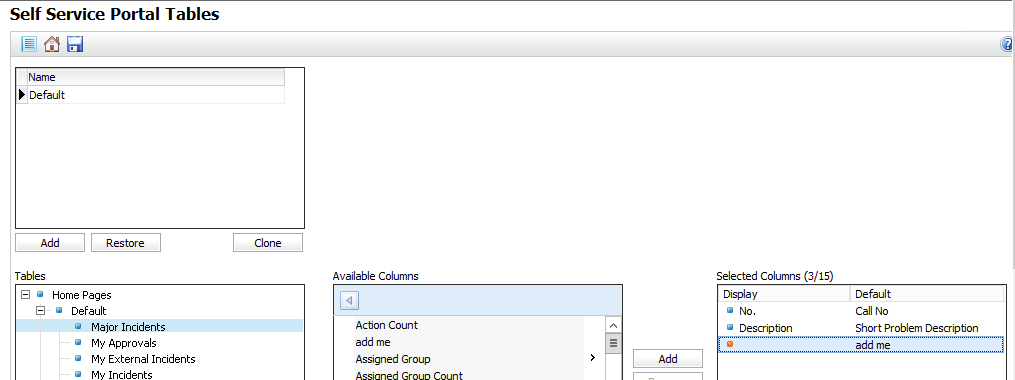
Select your columns with care, noting the following:
Columns in the Selected Columns box are prefixed with colored dots. Columns with an orange dot are mandatory, and cannot be removed.
When you rename a column, bear in mind that the column width will adjust to accommodate the length of the column names. The table width will also expand to accommodate the wider columns, if necessary, which will have an impact, particularly if your home page is the default view, which shows two tables side by side. In order to avoid distorting the page layout, you should keep the column names short.
If you insert multiple spaces in a column name, it will be displayed as a single space.
| Paged? |
This checkbox is selected by default. Leave selected to display the results in "pages", in which a specified number of items are displayed. If there are more entries in the table than can be displayed on a single page, pagination buttons appear beneath the table in the portal to display further entries. Deselect to display a scroll bar, enabling the user to scroll down the list of entries. |
| Page Size |
This field is only visible if Paged? is selected. Use the drop down list to select the number of entries you want to display on each page. |
| Sort By |
Use the drop down list to select the column on which you want to sort the table results. The drop down list contains all of the columns in the Available Columns list. The Sort By column does not have to be in the Selected Columns. It must be at the top level; you cannot sort on extension or lower level fields. If you select to sort on a Q/D field, the results are grouped by item, rather than in alphabetical order. |
| Desc/Asc |
Use the drop down list to choose whether the information is sorted in descending or ascending order. |
Next, you need to select/confirm the set of portal tables that is being used in your self service portal system to ensure that your settings are displayed on the portal.