Dependency Diagrams
A dependency diagram is a graphical display of all the tasks in a workflow which are required to complete a request. You can use it to create dependencies between tasks, that is, specify the order in which each will be completed, and which tasks need to be completed before others can be released.
There is no limit to the number of tasks and approvals that you can add to a workflow for completion of a request. However, your workflow may become difficult to read and understand if there are too many tasks displayed in the dependency diagram. It is therefore recommended to split your workflow into logical units to make it easy to use.
You can access the Task Dependencies windows using one of the following methods:
- Click the Dependencies button
 on the toolbar of the Request Details or Task Details window.
 - Select the Update Dependencies explorer option on the Request Details or Task Details window.
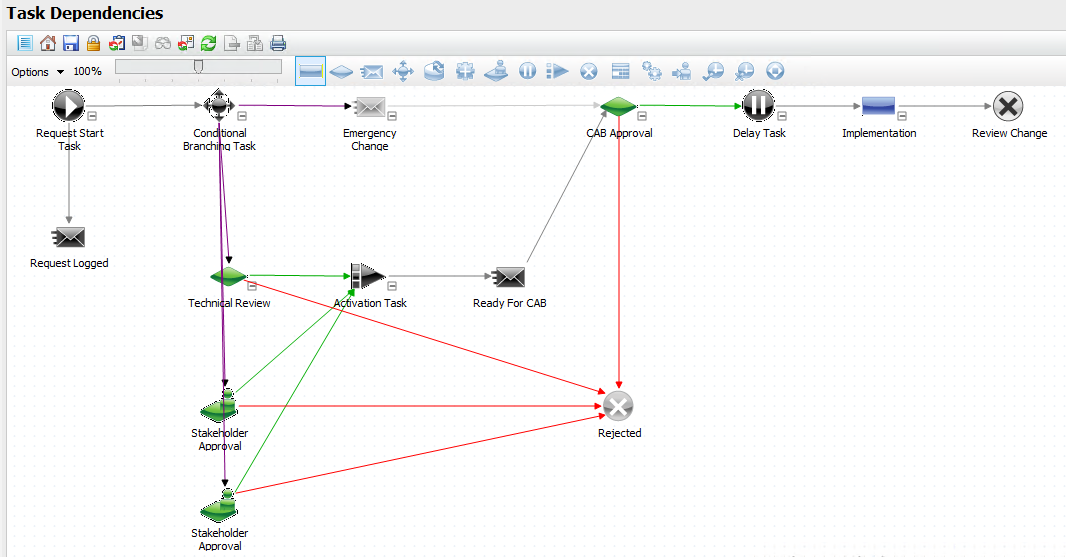
The Task Dependencies window displays:
- all the tasks and approvals that must be performed in order to complete a request.
- the dependencies that exist between the tasks and approvals associated with the request. You can see the order in which you must perform each task in order to complete the request and, within this, the tasks which must be completed before others can be released.
-
If you do not create any dependencies within a request, all tasks and approvals in the dependency diagram will begin at the same time (that is, as soon as the request is authorized).
Each task entity type on the dependency diagram of the Task Dependencies window is represented as a different icon.
Other features of the Task Dependencies window include:
- The task palette on the top-right of the dependency diagram displays all the available tasks which you can use to create a workflow for the current request.
-
You may need to select the Take Action option on the Request Details window prior to displaying the dependency diagram to see the task palette.
- The scrollbar on the top-left of the dependency diagram lets you zoom in and out, so that you see all tasks and approvals on the dependency diagram. Move the scrollbar to the left or right, to zoom out or in, respectively.
- As well as the standard toolbar buttons, the following buttons enable you to perform different functions on the dependency diagram:
- You can also right-click anywhere in the dependency diagram to display a pop-up menu with further options.
 The options include:

|
to change the dependency diagram into Review mode. In Review mode, you cannot add, delete or clone any tasks from the dependency diagram once the request is initiated. When the dependency diagram is locked, the button on the toolbar displays the |

|
to save the current positions and connections between all tasks and approvals in the request. This will reset any task or approval activations that have occurred |

|
to reset the position of all tasks and approvals in the request, relative to the start request |

|
to create a copy of the selected task. It is important to note that you can only clone tasks or approvals; you cannot clone component workflows |

|
to delete a selected task You cannot delete a task from the dependency diagram if the task has already been authorized. Tasks that have been authorized may already be active and actioned by an analyst. |

| Print Workflow | to print the dependency diagram |
| New | to add a new task to the dependency diagram |
| Clone | to create a copy of a selected task |
| Delete |
to delete a selected task You cannot delete a task from the dependency diagram if the task has already been authorized. Tasks that have been authorized may already be active and actioned by an analyst. |
| Lock |
to disallow adding new tasks to, cloning and deleting tasks from a dependency diagram. Once the tasks start getting implemented, the dependency diagram is automatically locked for editing. |
| Copy to Clipboard | to copy the dependency diagram to the Windows clipboard. You can then paste the diagram into any Windows application as a picture. |
| Activate/De-Activate |
These options do not appear if you are reviewing a request. Select to make a task active or inactive in a request workflow. When tasks are added to a request, they are suspended by default. You must activate a task in order for it to begin. |
Display Options in the Dependency Diagram
You can choose the information that you want to display or hide in the dependency diagram by selecting the Options button in the top left-hand corner, 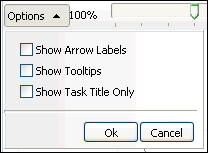 and selecting from the following settings:
| Show Arrow Labels | to display the types of dependencies between tasks on the diagram (for example: Rejected, Approved, etc.) |
| Show Tooltips | to display the name of the task and the analyst responsible for it when hovering the mouse over a task in the diagram |
| Show Task Title Only |
to only display the name of each task entity type icon on the dependency diagram If this option is not selected, the task number, task type and target date and time are displayed for each task in the workflow. |
Modeling a Workflow
An analyst can model a workflow within vFire Core using the Dependencies window. Modeling a workflow involves:
- creating all tasks and approvals needed to complete the workflow
- adding all dependencies between tasks and approvals to specify the order or conditions in which they are executed.
It is important that you plan your workflow carefully before creating the dependency diagram. Remember that:
- For a task to be run, all its parents must be completed.
- The task order is of utmost importance because it determines the sequence in which tasks will be run.
Adding Tasks to a Dependency Diagram
To add tasks or approvals on the dependency diagram:
- Select the required task type entity icon from the task palette.
- Drag and drop it onto the empty space in the dependency diagram.
 Alternatively, right-click on any empty space in the dependency diagram, select the New option from the menu and select the task you want to add to the workflow.

Once a task is added to the dependency diagram, you can select it and drag it to move it to the desired position. This enables you to create workflows which display readable processes, therefore making it easier to understand.
Linking Items in the Dependency Diagram
In order to create a workflow for the current request, you must add the necessary dependencies to the tasks and approvals on the dependency diagram. By adding dependencies, you are effectively defining the order to which you want all tasks and approvals to be carried out so that the current request for change can be completed.
A dependency structure can have more than one starting point, e.g. multiple approvals and tasks may be released at once. As workflows become more complicated, you must be careful of the order in which tasks are executed.
If an approval is set up requesting that a budget be approved to build a new report in an application, then there could be potentially two branches of tasks following on from the approval, as follows:
- If the approval is approved then tasks are released for the design, development and testing of the new report.
- If the approval is rejected there may only be one additional task notifying the relevant person that their request was rejected.
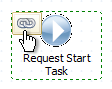
- Place your cursor over the first task. A chain link icon is displayed. Place your cursor over the chain icon. The cursor changes to a hand.

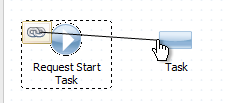
- Drag your cursor to the next task.
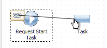
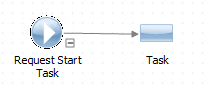
- Release the cursor. A link is created between the two tasks.
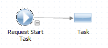 This means that Task B is dependent on Task A and that Task B will therefore only be released when Task A is completed.
 - To delete any links between dependencies, right-click the link and select Remove Link from the pop-up menu.
Approval Tasks on Dependency Diagrams
For approval tasks, you can indicate whether the next task (that is, the dependent task) should only be activated based on the approval outcome. In other words, you can set a dependency for a task to be released only when the preceding approval task has either been approved, rejected or to continue regardless of the approval outcome. If you set one of these dependencies following an approval, the color of the arrow will change: 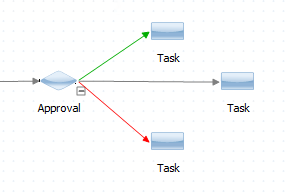
- a green arrow defines an ‘approved’ ‘completed’ or ‘succeeded’ dependency (that is, the next task will be released if the previous task is completed or approval is approved)
- a red arrow defines a ‘rejected’, ‘failed’ or ‘not completed’ dependency (that is, the next task will be released if the previous task is failed or approval is rejected)
- a black arrow defines a ‘regardless’ dependency (that is, the next task will be released regardless of whether the previous task is complete or not, or approval has been approved or rejected)
The first link that you create from the approval task on the dependency diagram to another task defaults to Approved, and subsequent links default to Rejected. To modify the type of dependency you want to create from an approval task, right-click the link and select one of the options (Approved, Rejected or Regardless).
In workflows where multiple Approval Tasks spawn dependent tasks, it is recommended that an Activation Task be used to control which task should be activated depending on whether the Approval Tasks are approved or rejected.
Recursions on Dependency Diagrams
It is possible for recursions to exist in your dependency diagram. Simply draw a dependency arrow back to a task or approval that occurred previously in the workflow. This characteristic is useful for when you wish to return to an earlier process in the workflow. For example, when developing software, if a bug has been discovered, you can direct the process to return to the development or testing sections of the workflow.
Adding Component Workflows
Component workflows are workflow templates that can be inserted dynamically into larger workflow templates. These can be reused any number of times. A component workflow does not have a request start task. You can use workflow components if you have processes that need to be performed on a regular basis or to automate a process that is fairly generic and can be used organization-wide.
Workflow components can be inserted into templates or into other components, but not directly in a request. The tasks in a component are automatically expanded in the request dependency diagram.
- Display the Request Details or Workflow Template. Select the Update Dependencies explorer option, or the button from the toolbar. The Task Dependencies window appears with icons for task entity types displayed below the toolbar.
- Choose the
 icon from the palette, and drag it to the window. A list of available component workflows is displayed in the Workflow Components pop up window. Select the one you want to use, and then select OK.
 - Connect the component workflow to the appropriate start and end tasks.
- Return to the details window and save the changes.
Care should be taken when using component workflows as it is possible to create an infinite loop. For example, you cannot insert component workflow A into component workflow A (A into A), however it is possible to insert A into B, and then insert B into A.
Defining a Component Connector
When importing workflow templates with component workflows, you may need to identify which connector tasks are used with a workflow template. As each Connector task title is set to "Connector" by default, we recommend that you rename the title of the Connector task (that displays when you add a component workflow to the dependency diagram) with a unique name. This way you will be able to identify the appropriate Connector task when importing your workflow template.
- View the templates.
- Select the template for which you want to define the component connector, and select
 .
. - In the Workflow Template Details window, select the button on the toolbar.
- The Dependencies window is displayed, showing any component connectors.
- Double click on the component connector you wish to view or modify.
- The Component Connector Details window is displayed. From here you can modify the details, such as the title, of a connector inserted as part of a workflow component.
- Select
 to save the connector details and return to the workflow dependency diagram.
Error Messages on Dependency Diagrams
| Error Message | What the message means |
|---|---|
| This will create a circular reference. This is only permitted for the Rejection branch of an Approval. | A circular reference refers to a situation where two items are dependent on one another to be completed before they can be released. |
| This will create a circular reference. Create as a rejected branch only? | This is similar to the previous message, except that if you click OK, the system will create the link as a rejected branch of the approval. |
| This dependency structure will not have any active Tasks. Are you sure you want to create this structure? | This indicates that according to the dependency structure you have created, there are no tasks that will be active when the request is authorized, i.e. there is no starting point. It is possible to create this type of structure where the request manager will be completing the first task and thus initiating the workflow process. |
| These tasks are already linked. | This type of link already exists between the tasks you are trying to connect. |
| You may not change this dependency type. | This message is displayed if you set the dependency type to, for example, rejected, and then change it later to another type, e.g. approved. A recursion you have added in the meantime means that ‘rejected’ is the only valid link type in this situation. |
| Cannot create a link to a Request Start Task | A Request Start Task is a system-generated task to mark the beginning of a request. It can only have links from it to other tasks. |
| Cannot create a link directly to or from a Component Task. You need to connect via Connector Tasks. | You cannot link a task to or from a Component workflow directly. VMware Service Manager provides connector tasks that enable you to link to or from a component workflow. |
Reading Request Progress in a Dependency Diagram
As tasks and approvals are completed in a workflow, the icons on the dependency diagram are constantly refreshed to reflect how the current request is progressing for completion. Each task entity type on the dependency diagram is assigned a certain color, used to denote the current status of each task or approval in the workflow.
| Task Color | Meaning |
|---|---|
|
Grey |
The task or approval is currently unauthorized. |
|
White |
The task or approval is currently inactive and authorized. |
|
Blue |
The task or approval is currently active and authorized. |
|
Black |
The task is completed. |
|
Green |
The approval is approved. The task is successful or completed. |
|
Red |
The approval is rejected. The task is failed or not completed. |
Toolbar Buttons on the Dependency Diagram
As well as the standard buttons, you will find the following buttons on the dependency diagram toolbar:
| Use | To... |
|---|---|
|
|
prevent the dependency diagram from being edited. You cannot add new tasks in this mode. Once clicked, this button changes to  and you can add tasks to the dependency diagram. and you can add tasks to the dependency diagram. |
|
|
save the current positions and connections between the tasks/approvals in the request, but resets any task/approval activations that have occurred |
|
|
reset the position of all the tasks and approvals in the request relative to the start request task |

|
restore the last saved state of the dependency diagram. All your changes since the last save will be lost |
|
|
creates a copy of the selected task. You cannot clone component workflows. |

|
print the dependency diagram. When you print the dependency diagram, the output will be slightly different from what you see online. Some links may not print correctly. |