Virtualization Workflow Automation
New functionality in vFire has enhanced the ordering, management and maintenance of virtualized environments.
You can now:
- Map resource groups to subscriber groups. This means that people can be mapped to a subscriber group when, say, an AD scan is run, rather than manually mapping them. The Action tab on the Mapping for Resource Type window now has an additional checkbox and Q/D field in which you can select a subscriber group to which you want to map. See Defining a Resource Mappingin the online help for more details.
- Make the request amendable at different stages in the workflow. A new Amendable checkbox has been added to the Request Completion Statuseswindow. When selected, the service actions and other details associated with the request can be amended at the selected statuses. To fine out more about amendable requests, see Setting Up Amendable Requestsin the online helpSetting Up Amendable Requests.
- Use an additional trigger option in all delay tasks. A new Parent Request Closed option has been added to all delay tasks, allowing you to trigger the delay task to activate when the parent request closes. See Delay Tasks for more details.
- Add further items to a request which has already been provisioned. See Post Provision Service Actions for more details.
- Associate workflow templates with service bundles, allowing you to assign an overarching workflow for the project. See Linking Templates to Service Bundles for more details.
- Hide items within the Self Service portal, based on their portal display category. A new Hide Child button on each tier in the Self Service Portal Display Categorieswindow allows you to hide some or all of the child items for a given Portal Display category.
- Share parent request CMDB items with child requests. You can now create master service catalog items within which sub items can be selected, sharing information from the master item with each child as specified by the requestor. See Sharing Parent Request Items with Child Requests for more details.
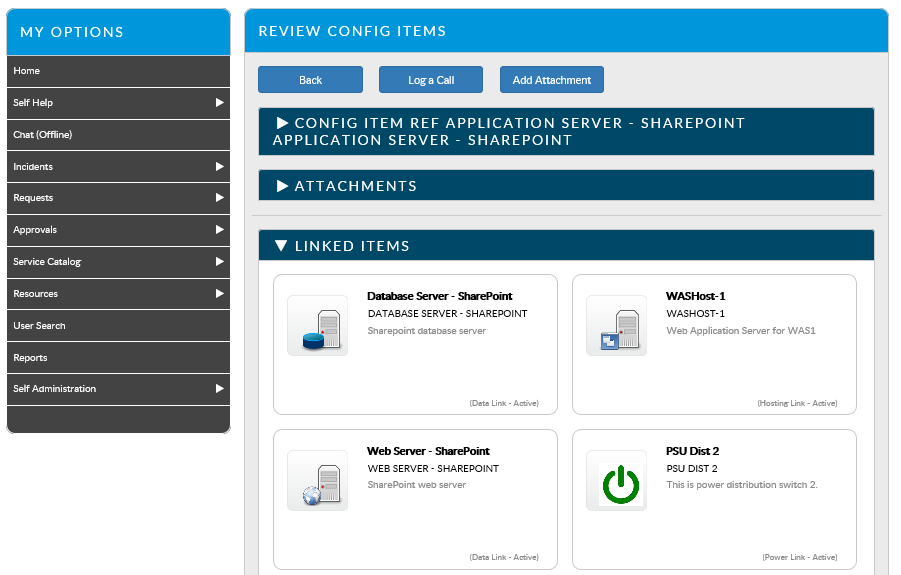
- View items linked to any CI in the Self Service portal. Linked items are now displayed as tiles on the Review screen in the Self Service portal. Users can select them to view their details.

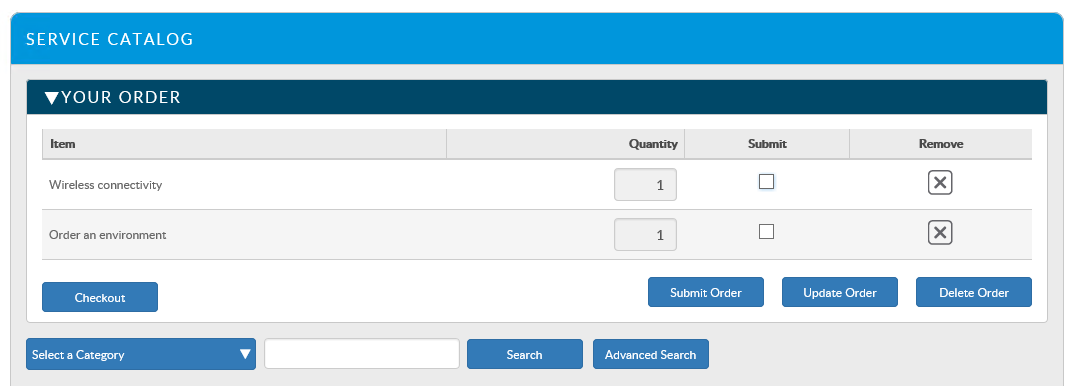
- Store selected items in a shopping cart in the Self Service portal. Users can now create a list of wanted items and then close the session without emptying their cart. They can then choose which of the items they want to submit for order, leaving the rest for a later order.

Post Provision Service Actions
You can identify certain service actions as available for ordering after the provision of the configuration item.
There are several steps involved in setting up post provisioning:
- In the Self Service Portal Display Categories window, create a Portal Display Category for the service actions that you want to make available post provision.
- In the Self Service Portal Settings window, select the Enable Post Provisioning Portal Display Category checkbox, and then specify the category using the Type Tiers selector field below.
- In the Adding a Service Action window, specify the same Portal Display Category.
When users review the resource in the portal, they will see an additional button - Post Submit Actions.
Selecting this button will take the user to the service catalog, which will display those service actions that have the "post provisioning" portal display category. Selecting Order will display the relevant form. If the Request CI's field is on the form, it will be automatically populated, and can then be used in the workflow to pass information about the configuration item to any outbound action.
Users can only use this feature if the request is at an amendable status.
To find out more about Post Provision Service Actions, see Setting Up Post Provision Service Actions in the online help
Linking Templates to Service Bundles
In the Service Bundle Details window, there is a new section called Templates, which contains a Create Request checkbox. Selecting it displays a Using template field, which is mandatory.
When users order a Service Bundle linked to a request, the workflow is triggered. 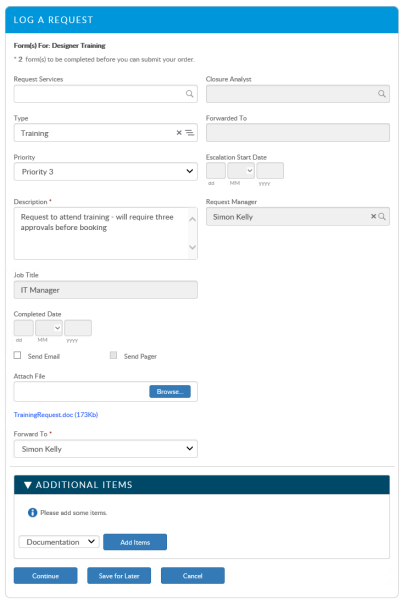
This form is editable in Designer the same way as any other Request Submission Form.
The screen displays the Submission Form linked to the Request of the Service Bundle. Beneath this, Service Actions can be added/edited and displayed. For more details, see Setting Up Amendable Requests.
Sharing Parent Request Items with Child Requests
There are several steps involved in sharing parent request items with the child request:
- In Designer, open the parent workflow screen, and add the Result CMDB Items field to the screen.
- Still in Designer, open the child workflow screen, and add the Parent Result CMDB Items field.
- Open the parent workflow's Manage CMDB Item task. In the Create Item Details section, ensure that Add to Request Field is ticked. Select Result CMDB Items in the field selector.
- Open the child workflow dependency diagram. Ensure that a delay task is placed before the Manage CMDB task.
- Open the Delay task, and set the Delay trigger is to Parent Request Closed.
When the request is submitted, the child request will wait until the parent request is completed. When the parent request closes it will populate the Parent Result CMDB Items field on the child requests with whatever values are entered on the Result CMDB Items field on the parent. This field can then be used to create links in the child request Manage CMDB task.
You can use the Manage CMDB Item task on the child to create a CMDB Item, and link it to the parent request CMDB Item.
- Open the Manage CMDB Item task on the child. Add a Create Item transaction.
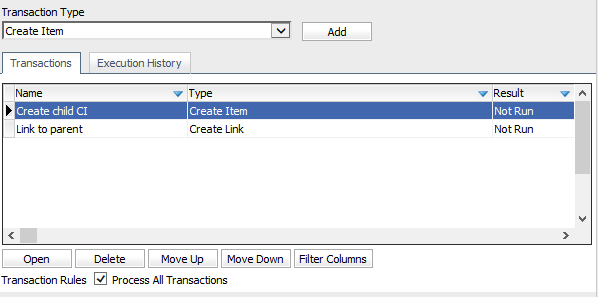
- Then add a Create Link transaction, adding the Parent Result CMDB Items field as Participant A. Add the result of the Create Item transaction as Participant B.
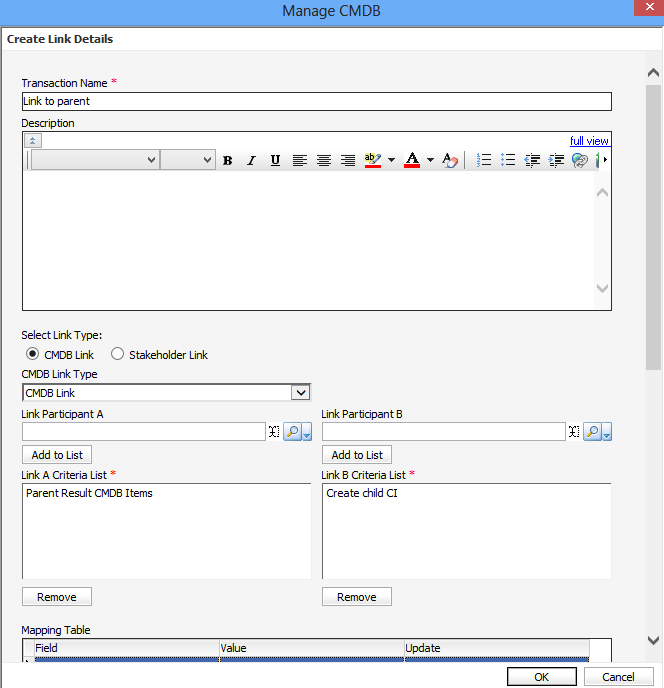
When this task runs, it will create a new CMDB item and link it to the CMDB items listed in the “Parent Result CMDB Items” field.