Configuration options are available to System Administrators to modify behavior and functions in Nano.
The following configuration options are available:
- IPK Management Security Role settings change the way calls in Nano behave for analysts with that role.
- Workflow Management Security Role settings change the way tasks and requests in Nano behave for analysts with that role.
- IPK Status Title settings control what happens to a call when a status is applied to a call in Nano, as well as what status columns are visible in Kanban layout.
- Workflow Status Title settings control what happens to a request or task a when status is applied to a request or task in Nano, as well as what status columns are visible in Kanban layout.
- Request Phases provide a graphical representation in tasks and requests in Nano, of the lifecycle of a workflow and it's current phase.
- Search Field settings change the search field behavior in Nano.
- Use Designer to modify Nano screens.
Minimum Configuration Recommendations
Prior to analysts using Nano, configure the system by following these recommendations. This is the minimum configuration required for analysts to work with calls, requests, and tasks in Nano.
Calls, requests, and tasks in Nano can be closed by assigning them a Status configured with the Close function. The same is true for stopping the clock on the SLA, resuming service, and approving or reject approval tasks. These functions must be configured on the task, request, and call statuses along with images to indicate, to the analyst in Nano, what function will be invoked on the work item. Follow the steps in this section to assign functions and images to statuses.
Outstanding screens in Nano offer a Kanban layout which displays work items as cards organized into columns that represent the item's Status. Systems that have more than a handful of statuses may prefer to define 'parent' statuses to keep the columns in Kanban layout to a reasonable number. Only statuses with the Parent setting appear as columns in Kanban layout. Follow the steps in this section to define parent statuses.
Configuring Statuses
Before you start
To configure call statuses, IPK Setup must be selected in the Admin tab of your General Access Security Role.
To configure request and task statuses, Workflow Management Setup must be selected in the Admin tab of your General Access Security Role
Call statuses must be configured for calls, request statuses must be configured for requests, and task statuses must be configured for tasks.
- In System Administration, navigate to the relevant Status window:
- Call Status Titles within IPK Management
- Request Completion Statuses within Workflow Management
- Task Status Titles within Workflow Management
- Identify a status for each of the following functions, and select the corresponding function checkbox:
- Close A status with this function will close a call or request. Only available for call statuses and request statuses.
- Close/Approve A status with this function will close and approve an approval task, or close a task. Only available for task statuses.
- Close/Reject A status with this function will close and reject an approval task, or close a task. Only available for task statuses.
- Stop Clock A status with this function will stop the SLA clock for a call or request. The clock will start again when a status without this setting is selected. Only available for call statuses and request statuses.
- Resume Service will resume service on the SLA for a call or request. Only available for call statuses and request statuses.
- Assign an image to each status to indicate to analysts in Nano which statuses perform which functions.
- Define Parent statuses. Parent statuses are displayed as columns in the Kanban layout in Nano Outstanding windows.
When a call, request or task is saved with one of these statuses, the function will take effect.
More detailed information about each of these settings is available below.
The other configuration settings described below are optional and can be used to enhance your analyst's experience with Nano.
System Administration Settings
Before you start
You must have:
- Security Roles Setup selected in the Admin tab of your own General Access security role before you can assign or remove permissions for any security roles.
- IPK Setup selected in the Admin tab of your General Access Security Role in order to configure IPK administration settings.
- Workflow Management Setup selected in the Admin tab of your General Access Security Role in order to configure Workflow administration settings.
- Nano selected in the Admin tab of your General Access Security Role in order to configure Nano administration settings.
Security Role settings
Analysts can access Nano with no changes required to their Security Roles. Nano options in Security Roles can be configured to change the way Nano behaves for analysts with those roles. The following settings are within the Security Role section of System Administration:
- IPK Management Role: Options Tab
- Workflow Management Security Role: Requests Tab
- Workflow Management Security Role: Tasks Tab
| Update Without Action | Select to allow analysts with this role to update a work item without first taking action. Hides the Take Action button on calls, requests, and tasks in Nano. |
| Take Over on Forward |
When analysts with this setting change the Assigned To value in a work item to another analyst, that analyst automatically becomes the current owner of the work item. Take Over on Forward cannot be used when assigning work items to groups. The current analyst remains the current analyst. |
Status Settings
Statuses in Nano can have images, and perform functions on the work item in Nano, such as stopping the SLA clock, closing a call, or approving a task. These settings only affect work items in Nano. The following settings are in System Administration in:
- The Call Status Titles window within the IPK Management section
- The Request Completion Statuses window withing the Workflow Management section
- The Task Status Titles window withing the Workflow Management section
| Default | Select this check box to assign this status to new calls created in Nano. | ||||||||||||||||||||
|
Close |
When a status with this setting is saved on a call or request in Nano, that work item is closed. Closed work items can be reopened using the Re-Open button; changing the status will not automatically re-open them.
Available for Call Status Titles and Request Completion Statuses only. |
||||||||||||||||||||
| Close/Approve | When a status with this setting is saved on an approval task in Nano, that task is approved and closed. Closed tasks can be reopened using the Re-Open button; changing the status will not automatically re-open them.
Available for Task Status Titles only. |
||||||||||||||||||||
|
Close/Reject |
When a status with this setting is saved on an approval task in Nano, that task is rejected and closed. Closed tasks can be reopened using the Re-Open button; changing the status will not automatically re-open them.
Available for Task Status Titles only. |
||||||||||||||||||||
| Clock Stop | When a status with this setting is saved on a work item, the SLA clock will stop (pause) on the linked agreement. Start the SLA clock again by selecting a status that does not have this setting. | ||||||||||||||||||||
| Resume Service | When a status with this setting is saved on a work item, the service is resumed and the SLA agreement is closed. Selecting a different status will not restart the clock. Available for Call Status Titles and Request Completion Statuses only. |
||||||||||||||||||||
| Image |
Select an image from the list to denote the function that will be performed on the work item when it is saved with that status. The corresponding image is displayed beside status name in Nano. Select None to display no icon. A status configured to close a call should be assigned the Close image.
|
||||||||||||||||||||
| Parent Status | Select to designate a status as the parent of the statuses beneath it. Multiple parent statuses can be defined, turning each status between them into 'child' statuses of the parent above. Only statuses defined as Parents appear as columns in the Kanban layout in Nano, and each work item is displayed within it's parent status column. | ||||||||||||||||||||
| Request Status | Task Statuses can be linked to a Request Status. When a task is saved in Nano with that task status, the parent request's status is updated to the one defined. Available for Task Status Titles only. |
||||||||||||||||||||
| Request Phase | Request Completion Statuses can be linked to a Request Phase. Request phases represent the various stages of the request lifecycle. Request phases are displayed graphically in the request details and task details windows in Nano, with the current phase highlighted. Available for Request Completion Statuses only. |


Request Phases
Request phases represent the various stages of the request lifecycle. Link Request Phases to Request Completion Statuses to displayed a segmented graphical representation on the request details and task details screens in Nano. As the request completion status changes, so does the phase segment highlighted in Nano. Request phases are displayed in the order in which they are listed in the Request Phases window within the Workflow Management section in System Administration.
Learn more about configuring and using Request Phases.
Search Field Settings
In Nano, when typing a search term into a search field, a filtered set of results displays directly beneath the search field. Configure the results set behavior by selecting which data columns to show in the results, which fields to include in the search, and how many characters must be typed before the result set is presented.
Nano Search Field settings are configured in the Search Field Settings window within the Nano section in System Administration.
Learn more about configuring Nano Nano Search Field Settings.
Designing Nano Screens
Before you start
To modify screens using the Designer, you must have Designer selected in the Admin tab of your General Access Security Role.
Using Designer, you can modify the entity screens that appear in Nano. The entity screens used in Nano are: Call, Request, Task, Knowledge, CMDB Item, Person, Organization, and Location.
To find and modify Nano screens:
-
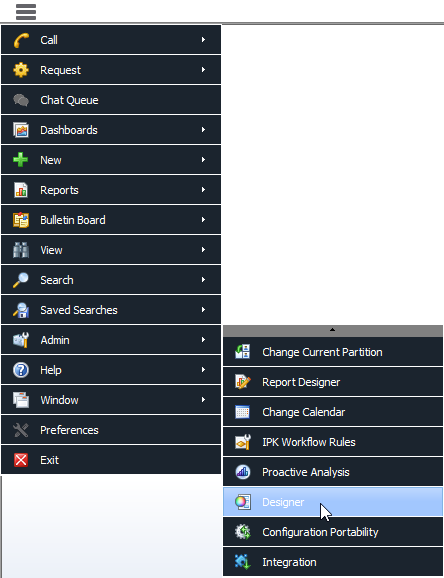
 Display the Designer window if it is not already visible on screen.
Select
 and then Admin.
From the submenu, select Designer.
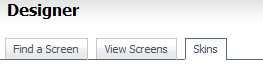
This window consists of three tabs
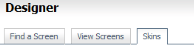 . They display different views:
Find a Screen Can be used to search for and work with specific screens, forms or message templates, as well as create new in-house screens View screens Displays details of currently selected screens and is used to modify screens Skins Enables you to create and modify skins for your vFire Self Service Portal(s) - Select the Find a Screen tab, then select an entity type (such as Call) from the Screens list in the left pane to populate the browse table.
- Using the Screen Design filter at the top, select Nano Screens from the list to display the screens available for Nano.
- From the browse table, select the Nano screen you want to modify and press
 .
. - Modify the screen as needed, and then press
 to save your changes.
Learn more about Configuring Screens.