Personal Settings
vFire Core has been designed to provide you with an easy to use interface. However, you may want to adjust the settings to suit your own needs and you can do so in a number of ways.
The settings described in this section only apply to your own login, and the partition in which you are in when you apply them.
Enabling/disabling Multiple Outstanding Windows
If you wish, you can have two or more Outstanding windows open. This can be useful as one might be showing your escalated calls while another is showing your group’s current calls.
If you would prefer to only have a single Outstanding window open at any one time, you can choose this configuration also. In this case, if, for example, you had a Calls Outstanding window open and then selected the View wrapper button, your existing outstanding window would be displayed. This is useful if you often accidentally select an Outstanding window button even though you already have one open.
- Select
 and then Preferences in the bottom bar of the menu window.
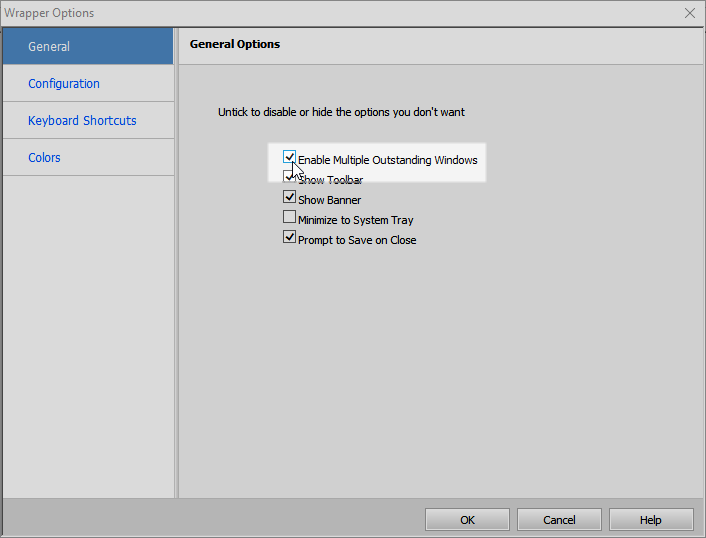
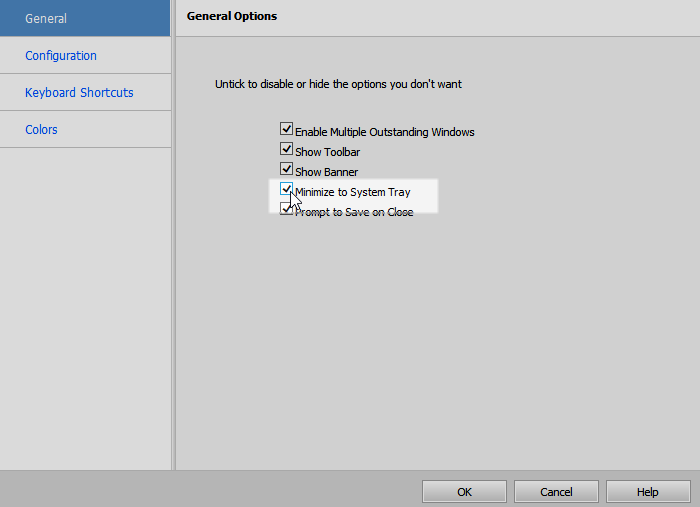
- The Wrapper Options window is displayed. On the General tab, select/deselect Enable Multiple Outstanding Windows.

- Select OK to save the changes and close the dialog box.
Showing/hiding the Wrapper
You can hide the wrapper from view if you wish to make the display area bigger. The functions provided by the toolbar can all be accessed from the menus with the same name. For example, search options can be accessed from the Search menu.
- Select and then Preferences in the bottom bar of the menu window.
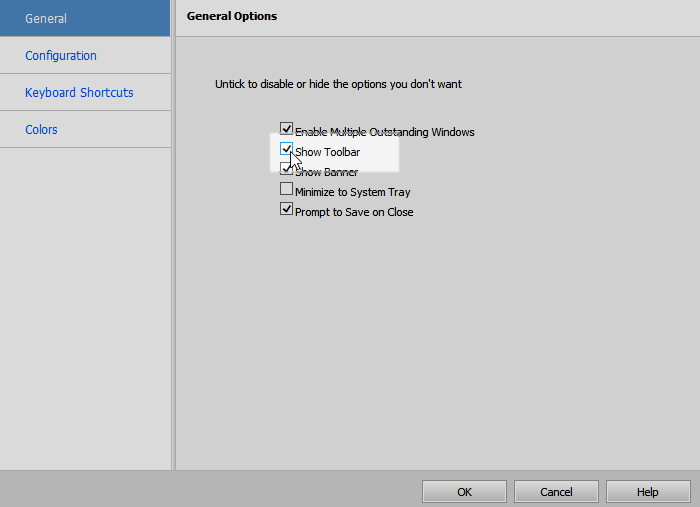
- The Wrapper Options window is displayed. On the General tab, select/deselect Show Toolbar.

- Select OK to save the changes and close the dialog box.
Showing/hiding the Banner
You can hide the banner, with the logo and version number if you wish.
- Select and then Preferences in the bottom bar of the menu window.
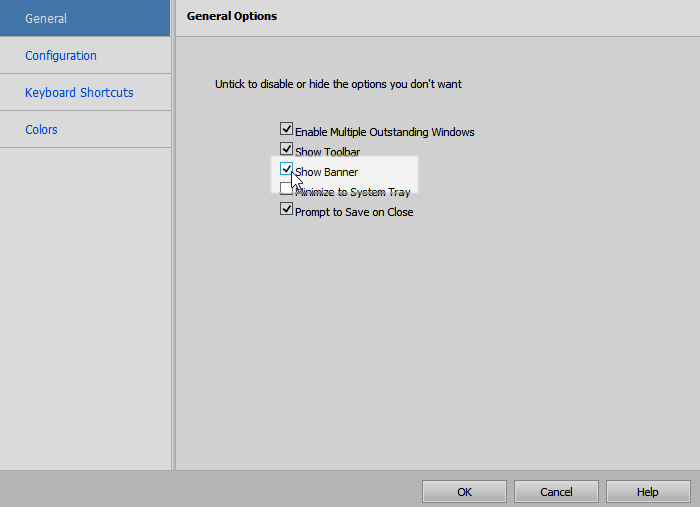
- On the General tab, select/deselect Show Banner.

- Select OK to save the changes and close the dialog box.
Minimizing to the System Tray
You can enable vFire Core to go to the system tray rather than the main Windows taskbar when you minimize the application.
- Select and then Preferences in the bottom bar of the menu window.
- On the General tab, select/deselect Minimize to System Tray.

- Select OK to save the changes and close the dialog box.
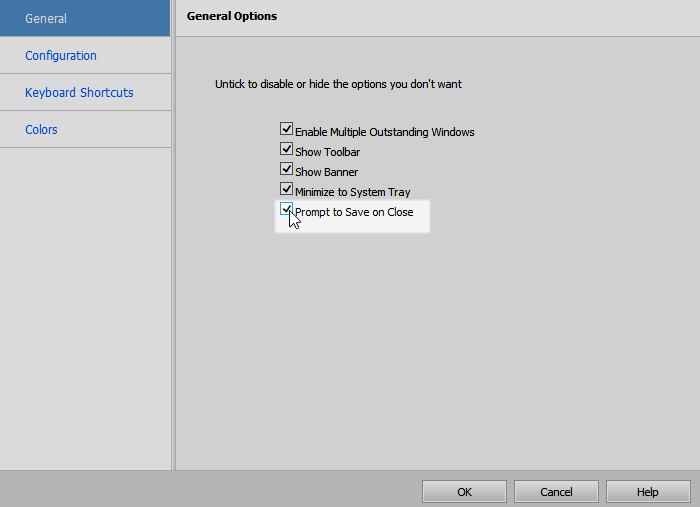
Prompting to Save on Close
You can instruct vFire Core to prompt you to save your changes when you close any window where you can modify or update information, such as Call Details.
- Select and then Preferences in the bottom bar of the menu window.
- On the General tab, select/deselect Prompt to Save on Close.

- Select OK to save the changes and close the dialog box.
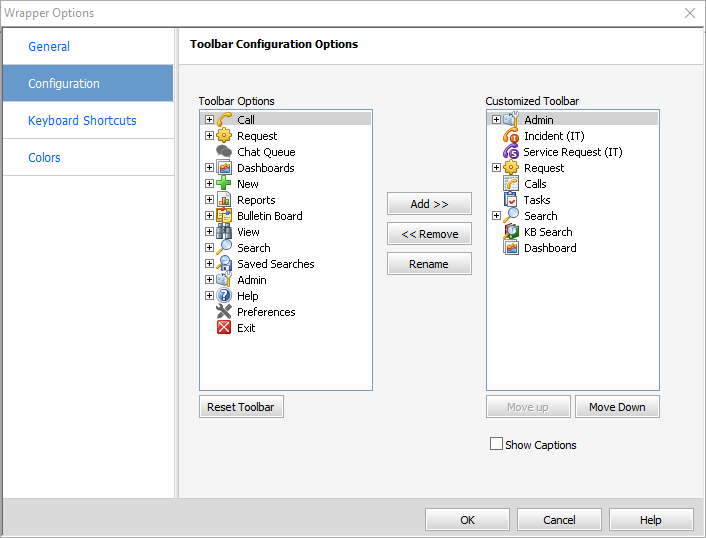
Configuring the Wrapper
You can change the appearance of the wrapper to display buttons for the options that you access frequently, and use the menu for the options you use less often.
-
Select
and then Preferences in the bottom bar of the menu window. - Select the Configuration tab.
 The Toolbar Options pane contains the available options, and the Customized Toolbar pane lists the options that are already displayed on the wrapper.
 - Select the item(s) in Toolbar Options that you want to add to the wrapper. Those buttons with a small + beside them contain a menu of further options. Select them to see what options they include.
- Select the option you want to add and then select
 to see them added to the Customized Toolbar list.
 - To remove an item from the wrapper, select it on the Customized Toolbar list and then select
 .
. -
Not all sub-menu items can be removed from a top level menu because they are generated based on your roles and system settings. Menu items that cannot be removed are dimmed.
- To rename a button, select it and then select
 . Overwrite the existing name with your chosen one. This will only update the name for your login account. Other analysts will not be affected.
 - To change the order in which the buttons are displayed on the wrapper, select the different options and use the
 and
and  buttons to rearrange the order in which they appear in the list.
 - To reset the toolbar to the default options, select
 beneath the list of Toolbar Options. Confirm the reset when prompted.
 - To display captions when you hover over a button, check the Show Captions box.
- Select OK to save the changes and close the dialog box.
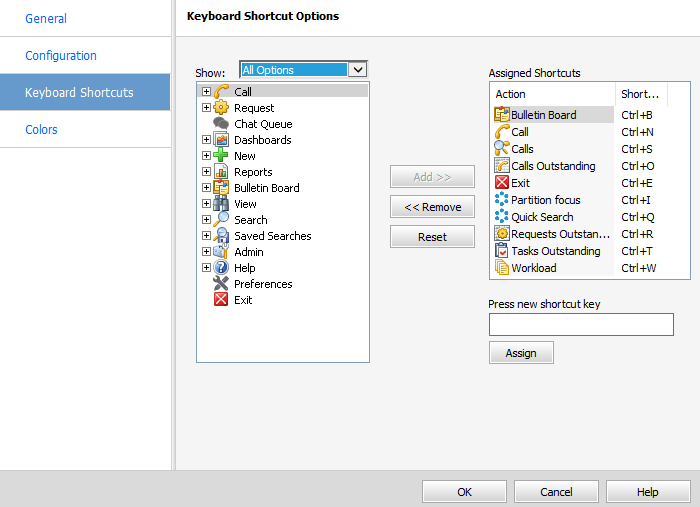
Creating Keyboard Shortcuts
You can assign shortcuts to common and frequently used functions within vFire Core.
-
Select
and then Preferences in the bottom bar of the menu window. - Select the Keyboard Shortcuts tab on the left hand side of the window.

- Use the Show drop down box to choose between all possible vFire Core functions to which you can assign keyboard shortcuts and those that only display in the wrapper. The list on the left updates according to the option selected. Functions with a plus beside them can be expanded to reveal further sub-options for selection.
- Select the option you want to assign a keyboard shortcut to and then select .
- The option is displayed in the Assigned Shortcuts list, without a shortcut. Key in the shortcut sequence you want to use to see it appear in the Press new shortcut key box.
- Select Assign. If the shortcut sequence is already in use, an error message box is displayed. When a shortcut is successfully assigned, you will see it appear next to the function in the Assigned Shortcuts list.
- To remove an assigned shortcut, select it on the list of Assigned Shortcuts and then select .
- To reset the shortcuts to the default settings, select
 .
. - Select OK to save the changes and close the dialog box.
Changing the Background and Menu Colors
You can change the background color of the wrapper from the default, and you can also change the font and background color of the menu.
This will also affect some dialog boxes.
-
Select
and then Preferences in the bottom bar of the menu window. - Select the Colors tab.

- Use the drop down boxes to select the Top Color and Bottom Color. The preview will show how the colors will look.
- To change the background of the menu, select from the drop-down list beneath Menu Color. To choose an alternative Menu Font Color, select from the drop-down list.
- If you want to reset to default colors, select Reset.
- Select OK to save the changes and close the dialog box.
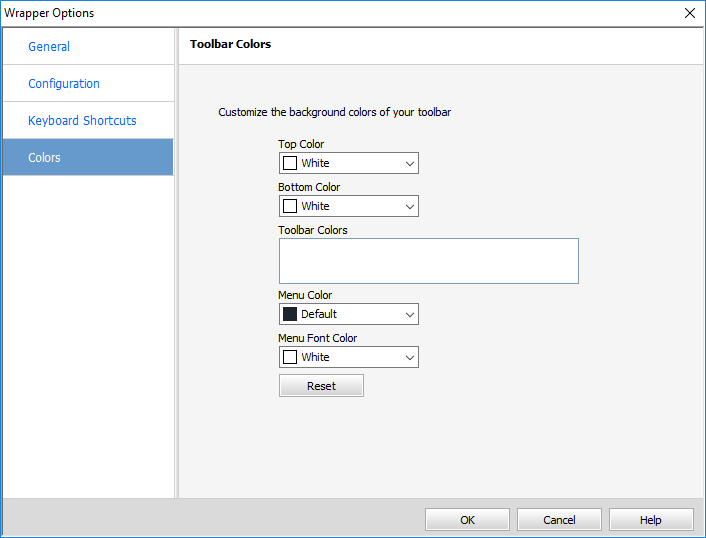
This resets all of the colors.
You can hide the wrapper from view if you wish, using the General tab.