Defining Working Hours
You can create sets of working times for your company, and configure them as working and non-working hours. You can then apply the different sets of working hours to different Agreements.
Before you start
You must have System Set Up selected in the Admin tab of your General Access security role.
-
Select the Menu button
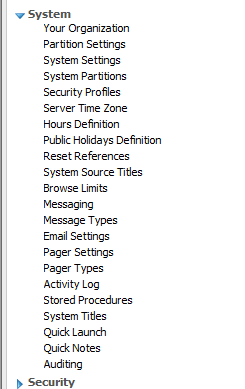
 , then Admin, and then select System Administration. The System Administration window is displayed
  . In the Explorer pane, locate the System group
  , scrolling up or down if necessary. You may need to expand the group to see the options within it.
 - Select the Hours Definition option from the Explorer pane. The top of the Hours Definition window displays a browse table with the different sets of working hours that have already been defined. The lower part of this window displays a grid that looks like a calendar with a row for each day of the week and a column for each hour of a 24 hour day, starting at midnight.
- Select
 . A blank row is inserted in the browse table.
 - Select the row if necessary and key in a name for the set of times you are defining (such as Standard Office Hours).
- Drag your mouse across the grid below to select a block of hours/days. Release it to see the hours displayed in the date pickers below the grid. Alternatively, use the date pickers to identify the working hours/days.
- Select
 to turn the selected hours into working hours. Deselect to see the hours highlighted in blue. Now you can add another block of hours if you wish.
 - To change working hours into non-working hours, select the hours either on the grid or using the date pickers, and select
 . The non-working hours will be displayed in white.
 - Select
 to save the changes. Provide the Change Reasons if prompted to do so.The window is updated and the first set of hours in the browse table is highlighted once more. If this is not the set you have just created, select your set and review it to ensure that you are happy with the hours displayed. You can now apply the set to an agreement.

At this point, you can only select continuous hours/days.
Copying a Set of Working Hours
You may find that you have quite a complicated set of working hours that you want to use as a basis for another set, and rather than creating it again from scratch, you can copy sets of working hours to create or update others.
Before you start
You must have System Set Up selected in the Admin tab of your General Access security role.
-
Select the Menu button
, then Admin, and then select System Administration. The System Administration window is displayed . In the Explorer pane, locate the System group , scrolling up or down if necessary. You may need to expand the group to see the options within it. - Select the Hours Definition option from the Explorer pane. The top of the Hours Definition window displays a browse table with the different sets of working hours that have already been defined. The lower part of this window displays a grid that looks like a calendar with a row for each day of the week and a column for each hour of a 24 hour day, starting at midnight.
- Select the set of hours you want to copy to display the hours in the grid.
- In the grid, drag your mouse across the grid to select the hours you want to copy.
- Select
 .
. - Select the set into which you want to paste the hours, or select and key in the name of the new set.
- Select
 to paste the hours. You can now modify them if you wish.
 - Select to save the changes. Provide the Change Reasons if prompted to do so.
Deleting a Set of Working Hours
You may find that you have multiple sets of working hours that contain the same pattern, or some of them are now redundant. If so, you can delete them. However, you cannot restore deleted sets of hours, they must be recreated.
Before you start
You must have System Set Up selected in the Admin tab of your General Access security role.
-
Select the Menu button
, then Admin, and then select System Administration. The System Administration window is displayed . In the Explorer pane, locate the System group , scrolling up or down if necessary. You may need to expand the group to see the options within it. - Select the Hours Definition option from the Explorer pane. The top of the Hours Definition window displays a browse table with the different sets of working hours that have already been defined. The lower part of this window displays a grid that looks like a calendar with a row for each day of the week and a column for each hour of a 24 hour day, starting at midnight.
- Select the set of hours you want to delete in the browse table, and select
 . The set disappears from the list.
 - Select to save the changes. Provide the Change Reasons if prompted to do so.